Building My First macOS App with Two Codex Prompts
🚀 Download the App: A pre-built binary is available on GitHub Releases.
I haven’t been using the keyboard 100% of the time for a while now. Much more often, I simply dictate text by voice, expecting fast and accurate speech-to-text.
Mostly, this is for talking to AI models. My wife even jokes that I talk to my computer more than I talk to her nowadays. And frankly, those jokes aren’t unfounded: I genuinely believe that for an LLM to deliver outstanding results, the more live context, nuance, and background details you feed into it, the better the output. Typing out walls of text by hand on a keyboard is just tedious and slow.
That’s precisely why I needed a voice dictation tool. Not some generic app, but something that behaves exactly how I want: hold down a single hotkey (push-to-talk), pour out my thoughts, release the key, and have the transcribed text appear immediately right where the cursor is blinking.
What Didn’t Work with Existing Tools
There are great options on macOS. I tried multiple alternatives, and two of them stood out.
Wispr Flow is fantastic: sleek UI and instant response. But the free tier hits limits quickly, and after that, it requires a recurring monthly subscription.
Then I tried MacWhisper:
MacWhisper is a solid product. It runs models on-device for free, which is fantastic for privacy. But I wanted to route audio to a fast remote cloud model where I already had dedicated API access. And the option to plug in a custom server URL and API token in MacWhisper is locked behind a paid Pro license.
All of these apps are great in their own right, but they share one common drawback: they want money from you.
And in the era of AI, when an app asks for a subscription for a basic wrapper — we just sit down and build our own vibecoding fork.
How Simple Flow Works
I didn’t write a single line of Swift code myself for this app. Everything from initial architecture to the final compiled bundle was created by OpenAI Codex in just two prompts.
At a high level, the whole pipeline comes down to four obvious steps:
- Catch the hotkey: The app sits quietly in the Menu Bar and globally detects holding down the
Fn(Globe) key in push-to-talk mode. - Record audio: While the key is held, sound from the system microphone is recorded into a buffer.
- Send to the cloud: The moment the key is released, the audio is sent asynchronously to my custom remote endpoint with token authorization.
- Paste the result: The returned transcript is immediately pasted into the active frontmost window via synthetic ⌘V keystrokes.
Development in Two Prompts
Prompt 1: Core Logic & Architecture
In the first prompt, I simply described the chain of events in plain words: background daemon, Fn key hold, audio recording, network request, and active focus text insertion.
Codex pulled in the necessary macOS frameworks (AVFoundation, ApplicationServices, CoreGraphics) and wired together a clean, functional state machine, event tap hotkey monitor, and synthetic text injector:
public enum DictationPhase: Equatable, Sendable {
    case idle
    case recording
    case transcribing
    case feedback(FeedbackKind)
}

public struct DictationStateMachine: Sendable {
    public private(set) var phase: DictationPhase = .idle

    public mutating func handle(_ event: DictationEvent) -> [DictationEffect] {
        switch (phase, event) {
        case (.idle, .hotkeyPressed):
            phase = .recording
            return [.captureFocus, .startAudio]

        case (.recording, .hotkeyReleased):
            phase = .transcribing
            return [.stopAndTranscribe]

        case (.recording, .escapePressed):
            phase = .idle
            return [.cancelAudio, .returnToIdle]

        case (.transcribing, .transcriptionInserted):
            phase = .feedback(.inserted)
            return []

        case (.transcribing, .failed(let message)):
            phase = .feedback(.error(message))
            return []

        default:
            return []
        }
    }
}
import ApplicationServices
import CoreGraphics
import Foundation
public final class HotkeyMonitor: @unchecked Sendable {
private var eventTap: CFMachPort?
private var decoder: HotkeyEventDecoder
public init(hotkey: Hotkey = .fnKey) {
self.decoder = HotkeyEventDecoder(hotkey: hotkey)
}
public func start() {
let mask = (1 << CGEventType.flagsChanged.rawValue)
self.eventTap = CGEvent.tapCreate(
tap: .cghidEventTap,
place: .headInsertEventTap,
options: .listenOnly,
eventsOfInterest: CGEventMask(mask),
callback: { (proxy, type, event, refcon) -> Unmanaged<CGEvent>? in
guard let refcon = refcon else { return Unmanaged.passUnretained(event) }
let monitor = Unmanaged<HotkeyMonitor>.fromOpaque(refcon).takeUnretainedValue()
monitor.handleFlagsChanged(event.flags)
return Unmanaged.passUnretained(event)
},
userInfo: Unmanaged.passUnretained(self).toOpaque()
)
let runLoopSource = CFMachPortCreateRunLoopSource(kCFAllocatorDefault, eventTap, 0)
CFRunLoopAddSource(CFRunLoopGetCurrent(), runLoopSource, .commonModes)
CGEvent.tapEnable(tap: eventTap!, enable: true)
}
}import CoreGraphics
import Foundation
public final class SystemEventPoster: EventPosting, @unchecked Sendable {
public func postPasteCommand() -> Bool {
let cmdKeyCode: CGKeyCode = 55 // Command key
let vKeyCode: CGKeyCode = 9 // 'V' key
let source = CGEventSource(stateID: .combinedSessionState)
guard let cmdDown = CGEvent(keyboardEventSource: source, virtualKey: cmdKeyCode, keyDown: true),
let vDown = CGEvent(keyboardEventSource: source, virtualKey: vKeyCode, keyDown: true),
let vUp = CGEvent(keyboardEventSource: source, virtualKey: vKeyCode, keyDown: false),
let cmdUp = CGEvent(keyboardEventSource: source, virtualKey: cmdKeyCode, keyDown: false) else {
return false
}
cmdDown.flags = .maskCommand
vDown.flags = .maskCommand
vUp.flags = .maskCommand
cmdUp.flags = []
// Post Command+V synthetic event tap directly to active focused application
cmdDown.post(tap: .cghidEventTap)
vDown.post(tap: .cghidEventTap)
vUp.post(tap: .cghidEventTap)
cmdUp.post(tap: .cghidEventTap)
return true
}
}Prompt 2: Settings Window & Production Build
In the second prompt, I asked for standard usability features:
- Live status in the menu bar (
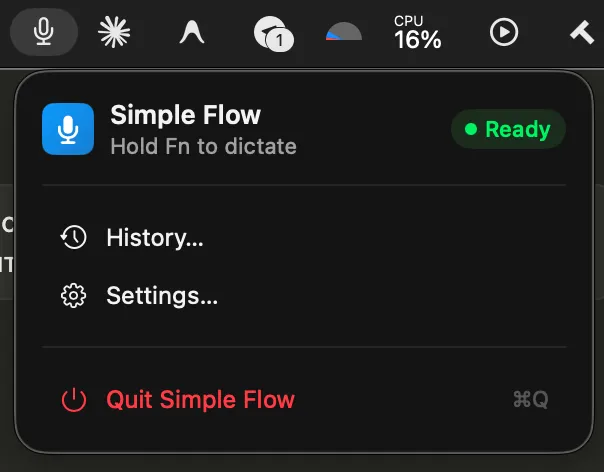
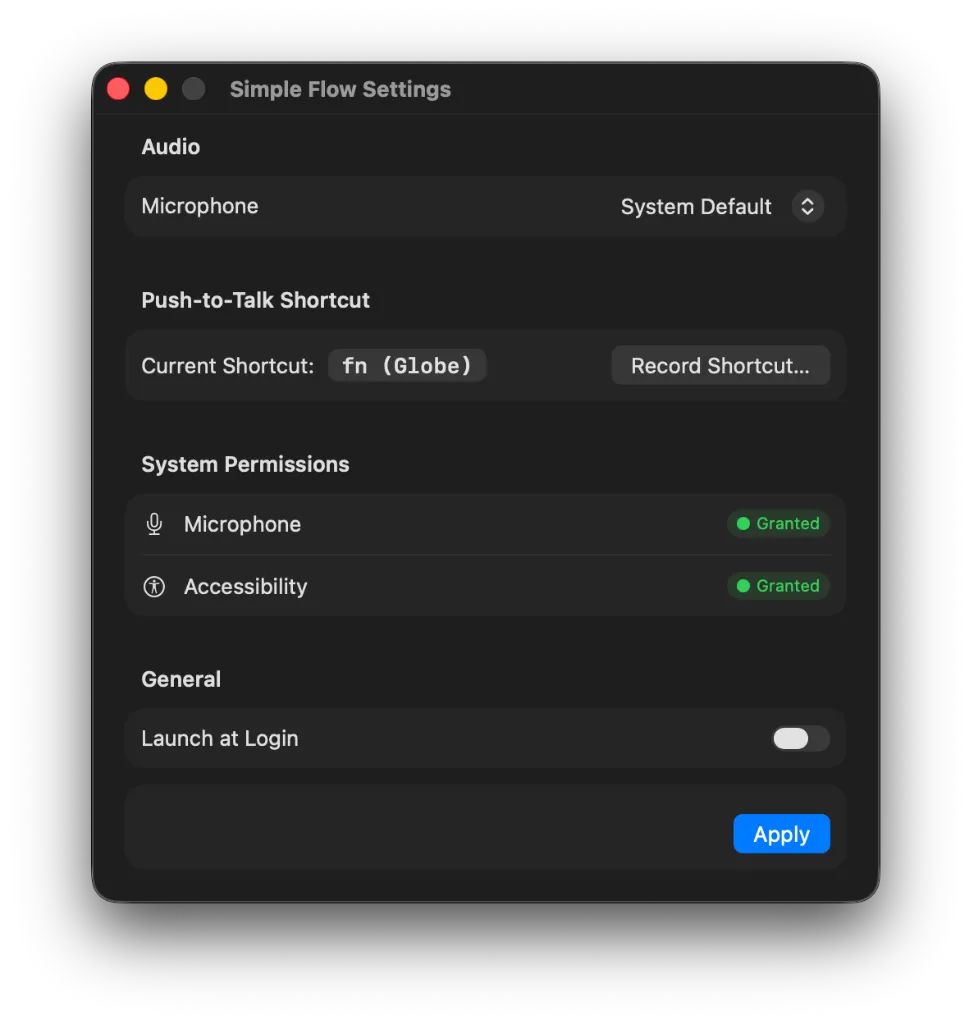
Ready/Recording). - A native settings window: microphone selection, custom shortcut recorder, macOS permission checks (Accessibility, Microphone), and launch at login.
- Secure storage for the custom endpoint URL and API token.
- Build scripts outputting a production-ready
.appfile.
Codex wrote the UI, compiled the Swift code right in the terminal, and handed me SimpleFlow.app.
The Result
I dragged SimpleFlow.app into /Applications, pasted my server endpoint and API token into the settings, and it worked on the very first try exactly the way I wanted.
I even captured live system telemetry via top while writing this post:
- CPU:
0.0%in idle (the process remains in asleepingstate in the RunLoop and only wakes up onCGEventTaphotkey interrupts). - RAM:
~50 MB(the baseline footprint of standard macOS AppKit and SwiftUI frameworks).
It uses negligible CPU and memory, lives quietly in the menu bar, and lets me dictate long, contextual prompts into AI models without subscriptions or artificial paywalls.
Source Code & Releases on GitHub
I’ve made the entire project open source on GitHub:
You can download pre-built release binaries (SimpleFlow-v1.0.0.zip) directly from the GitHub Releases page. To install, simply extract the archive and drag SimpleFlow.app into /Applications.
Bottom Text
In 2026, personal software is no longer a myth, but a reality for everyone — even for people with zero programming experience. Building your own custom tool tailored to your exact needs is now easier than hunting down the perfect alternative on the internet.
I don’t know what other conclusion to draw from this — just go build and use it, folks.